As part of my efforts to not just write and paint full time, but to actually get my work out in front of people, visible to the world, and hopefully engage people’s interest, I am going to try to document my “process”… Whatever that means. In this case, it means that I have taken a series of photographs of the painting I created this week, ‘audacity of hope’, showing each step along the way from basic background to completed painting.
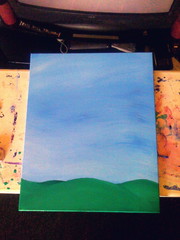
You may have seen the first image, which I posted Monday night, which is pretty basic. I painted a simple, nearly cartoonish background. Blue sky, green hills, using the style I’ve been developing for creating interesting, dynamic backgrounds. This, in itself, is pretty straightforward: big, soft brush, lots of water, usually just one color and white – though sometimes I’ve used multiple colors, and often I’ll pre-create the hue I want from multiple inputs – this time I wanted a pretty basic palette, so I used the pure blue and green that Utrecht gave me. That was actually all I did with the painting on Monday.
 Tuesday, it was time to begin the real work, so I booted up Photoshop and iPhoto, and got down to the digital part of the project. I took the photo from the previous day, and adjusted the image to “pop” the painting itself out of its background and into square, plus appropriately proportioned for the actual canvas size, as pictured at the right. This itself is a pretty straightforward thing to do, as long as you keep in mind that you don’t want PS to be creating any new information about your image – which is to say that all dimensions should stay the same or get smaller, never bigger. After this step, I cropped down so I was only working with the canvas, and then switched to iPhoto to find my “reference material”.